A live demo app is available here (XR# Samples Gallery – under construction).
No headset is required. The app works both in Web browsers and VR/AR.

You can also play with the work-in-progress XRSharp Online Playground, which lets you play with the 3D XAML elements online.
NuGet feeds:
- Latest XR# NuGet packages (pre-alpha):
https://www.myget.org/F/xrsharp/api/v3/index.json - Latest OpenSilver NuGet packages (develop branch):
https://www.myget.org/F/opensilver/api/v3/index.json
Pre-requisites:
- Visual Studio 2022 on Windows (Note: other IDEs and platforms might work, but they have not been tested yet)
- The latest version of the ASP.NET Core Hosting Bundle, available from Microsoft here
To get started:
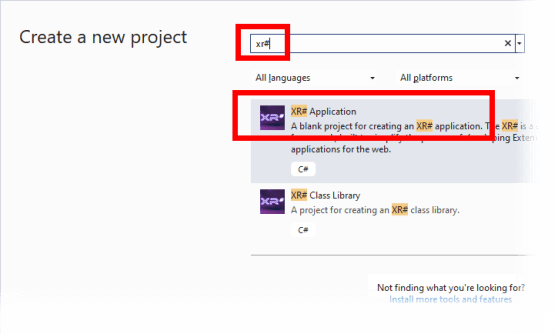
- Download and install this Visual Studio Extension (.VSIX) version 0.1.7.4 (July 9, 2024). It will install some project templates.
- Use the “Add New Project” dialog of Visual Studio 2022 to create a new “Hello World” XR# project:
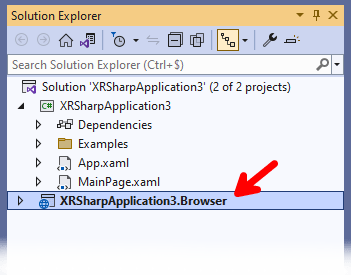
- Run the project that has the “.Browser” suffix:
- The “Hello World” app shall launch in your default browser:

If nothing shows up, read the Troubleshooting section.
- To test on a headset, read the section after below
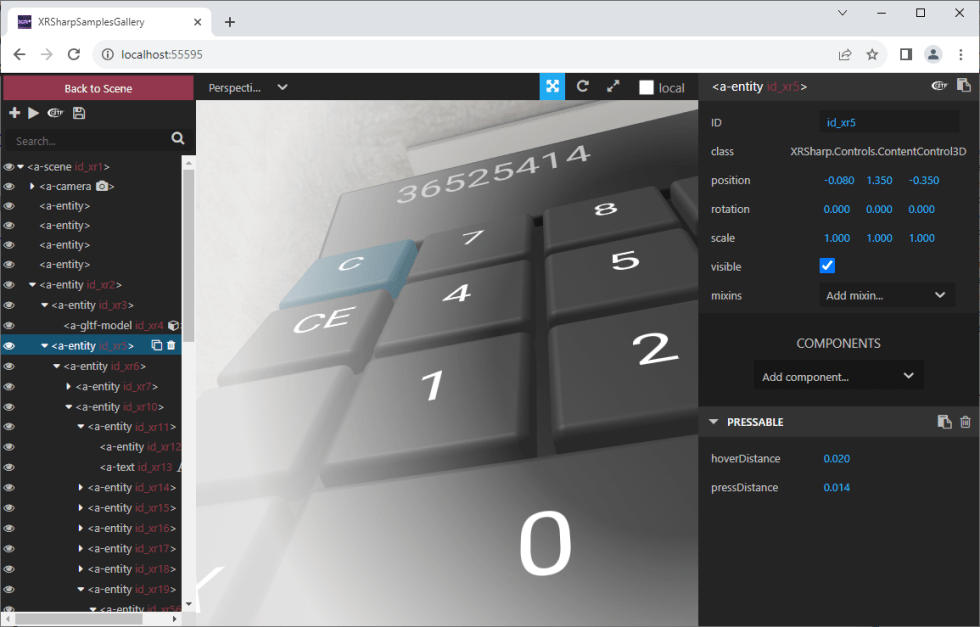
You can open the runtime 3D inspector (powered by A-Frame) by pressing Ctrl+Alt+I. Note: with the current version of XR#, since this keyboard shortcut is also used by Blazor, you may need to press Ctrl+Alt+I multiple times until it starts working.
XR# applications are powered by WebXR, which means that they will work on all headsets via their web browser.
The main steps are:
- Put your headset on
- Open the Web Browser that is built into your headset operating system. For example, on the Meta Quest, it’s named “Browser” and you’ll find it in the App Library:

- Navigate to the URL of your application. If the URL is not accessible from the headset (such as “localhost:55595”), read the section after this one.

- Your XR# app will detect that it’s running on an AR/VR device and will show two buttons on the bottom-right to enter AR or VR. Click one of those two buttons to enter the immersive experience.
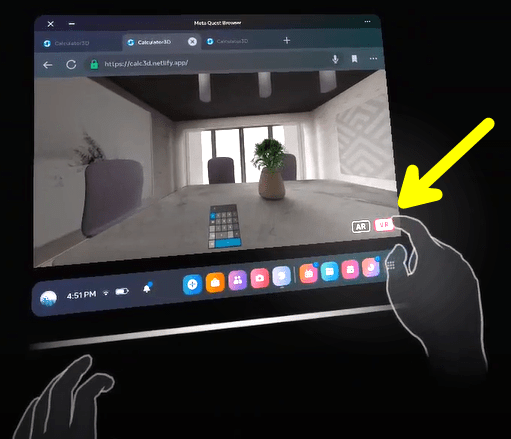
- Enjoy the immersive experience!
For example, try interacting with the 3D elements:

And try moving objects around by “grabbing” them:

When you run an XR# from Visual Studio, it will generally run from a URL such as: http://localhost:55595/
The challenge with that kind of URL is that, depending on your computer and network configurations, it may not be immediately accessible from the headset of your browser. Usually this requires both your computer and your headset to be on the same local network, and the Firewall of the computer operating system shall be configured to let external requests access the required ports.
There are multiple approaches to address this challenge.
The approach below has been tested with the Meta Quest headset.
Prerequisites (initial setup – to be done only once):
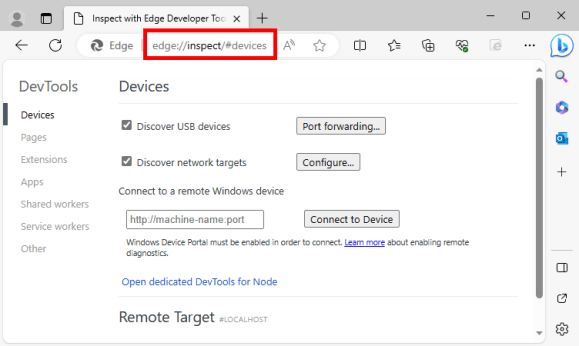
- Launch a new Edge or Chrome window, and navigate to the following URL:
- If you are using Edge, navigate to: edge://inspect/#devices
- If you are using Chrome, navigate to: chrome://inspect/#devices
- Click the “Port forwarding” button:

- Enter the following Port Forwarding settings and click Done:
2000 -> localhost:2000
8080 -> localhost:8080
(Note: you may need to add additional ports depending on the ports that your XR# app is using – make sure to keep an eye on the browser Console for errors related to inaccessible ports)
Now that the prerequisites are done, let’s see how to proceed every time that you want to access your app from your headset:
- Launch your XR# app from Visual Studio on your computer. This should launch a browser window on your computer. Verify that the application works, and take note of the exact URL (for example: http://localhost:55595/). Make sure to keep this browser window open throughout the tutorial.
- Connect the Meta Quest headset to your computer using a USB cable.
- Make sure that the Meta Quest is connected to the same local network as your computer (usually the same Wi-Fi)
- Launch the Browser on your Meta Quest headset and type the address of your application as noted at step #1.
- Start by following the exact same steps as described in the previous section above. In particular, make sure that you have:
- Configured the prerequisites (Port Forwarding)
- Launched your XR# application in Debug mode from Visual Studio (keep it running)
- Connected your headset to your computer using a USB cable
- Launched the web browser inside the headset
- Then, launch a new Edge or Chrome window on your computer, and navigate to the following URL:
- If you are using Edge, navigate to: edge://inspect/#devices
- If you are using Chrome, navigate to: chrome://inspect/#devices
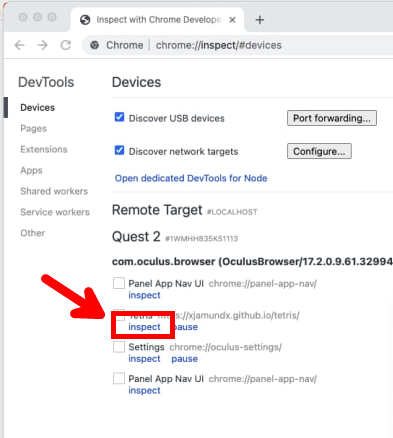
- Give it a few seconds to recognize your headset (tested with Meta Quest). It shall appear in the list of devices on that page. There should also be the list of browser windows that are currently open in the browser on your headset. If you don’t see them, put your headset on and check for any error messages or requests for authorization. In fact, for security reasons, you need to authorize inspection/debugging from the settings of your headset. On the Meta Quest, this is done very easily: as soon as you connect it via USB and navigate go to the “inspect/#devices” page on your computer (as described above), a popup message will be displayed inside your headset that requests your authorization for inspection/debugging. Just click Authorize and you are good to go.

- Choose any of the browser windows listed there, and click the “inspect” button next to it, as shown in the following screenshot:
- The browser Developer Tools should appear. You are now debugging the headset browser from your computer. Now type the URL of your application (the same as on your computer, like http://localhost:55595/). This will instruct the headset browser to navigate to your application.

- You should now be able to use your XR# app in your headset while debugging it in Visual Studio on your computer.